
Tutorial - Daisy Pencil Topper
by Maria Vanderform,
Stampin' Up Demonstrator


These are unique gifts for your downline, customers, hostesses or family members. They are economical, fun, and easy to make.
Supplies:
- Daisy Die #2
- Scallop Circle die
- 1/2" circle & 1" circle punch
- 2 pieces of 5 by 6" of coloured card stock
- 1 small piece of Old Olive Card stock
- Pencil
- Bone Folder
- Tombo Glue
- Crystal Effects
- Spritz (mixture of rubbing alcohol and Frost White shimmer paint)
- Paper snips
- Sticky strip\
1. Using the Daisy Die #2 and the card stock pieces cut 2 of each size of petal.
2. With the Scallop Circle punch, punch 1 Old Olive scallop circle
3. Punch one 1/2" and 1" circle (the colour doesn't matter)
4. These are all the pieces that you need.

1. Reinsert this scallop circle back into the punch. (I make a fishing pole to help me).

Rotate the punch so that the teeth of the punch are pointing into the scallops. Punch.

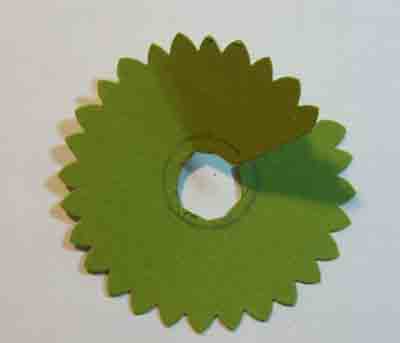
This is what the scallop circle looks like now.

2. Draw a small circle in the middle of the circle (I have a yellow circle) - this is where the pencil will be inserted.
3. With your paper snips, cut between one of the scallops to the middle of this circle. Then cut out the drawn circle out.

4. Use a piece of sticky strip and place it at the 4th scallop from the slit. Remove the pink protective piece, and overlap the cut ends to form a cone.

1. Using tombo glue (sparingly), glue the large petals together, alternating the petals.


2. Do the same for the medium sized and the smaller petals

3. Turn the large and the small petals over. Glue a 1/2" circle over the hole of the small flower unit; a 1" circle over the hole of the large flower unit.

4. Now adhere the flower pieces together. Set aside to dry.


Adhere to Pencil:
1. Take the green cone, and with a bone folder, fold the scalloped edges back a little. Apply tombo glue to this area.

2. Apply crystal effects to the top of the rubber of the pencil, and around the metal edges.
3. Insert the pencil through the bottom of the hole in the green cone.
4. With the flower upside down, attach the green cone with the pencil in it to the back of the flower.
Make sure the scallop edges adhere to the bottom of the daisy. Leave to dry. This may take 30 minutes.

Shape Flower:
1. Start with the larger petals. With a bone folder, gently curl each individual petal downwards. Do one layer at a time.

2. Curl the medium and small flower petals upwards.
3. Apply tombo glue to a 1/2" yellow circle and attach to the center of the flower.

Spritz flower with a mixture of alcohol and from white shimmer paint and allow to dry.

© 2011Maria Vanderform. All rights reserved.
No comments:
Post a Comment